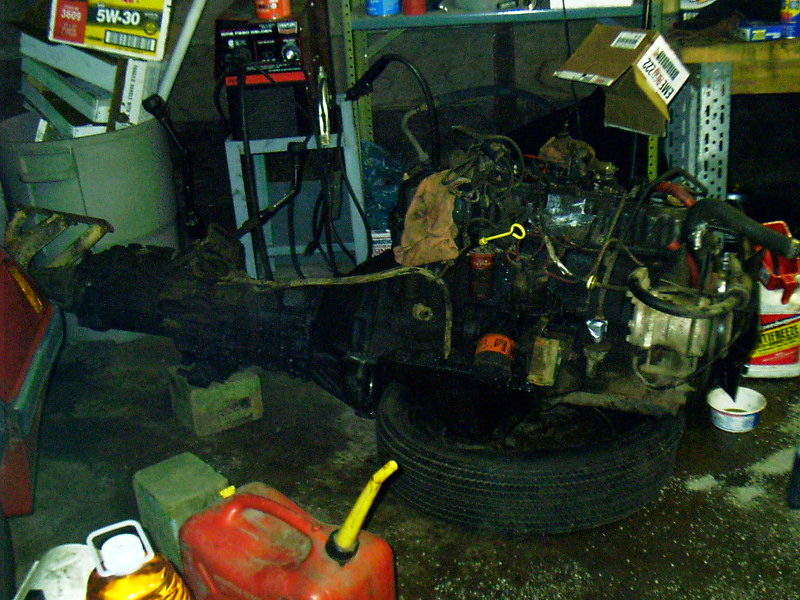
Here are some pictures taken during the process of swapping a Chevy 350 crate engine into my '87 YJ Wrangler. I hadn't done any engine swaps prior to this, so it should be proof that anyone that wants to get it done, can get it done. I did however have some help flowing in from some friends who had already done this swap on their Jeeps. I would recommend making sure that you have all of the necessary accessories before starting into the project. It's much nicer to have everything as you need it rather than have to wait for it. Anyway, here's a few pictures taken at the beginning of the project before anything had been done. It started as an '87 YJ Wrangler with the 4.2L engine, and a manual transmission. I had somewhere around 141,000 miles on it and it was time to get a bit more power...
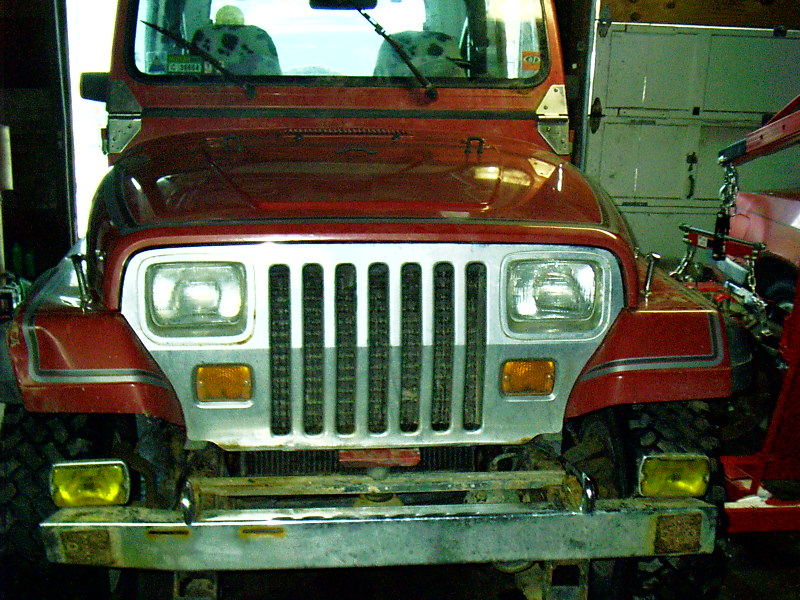
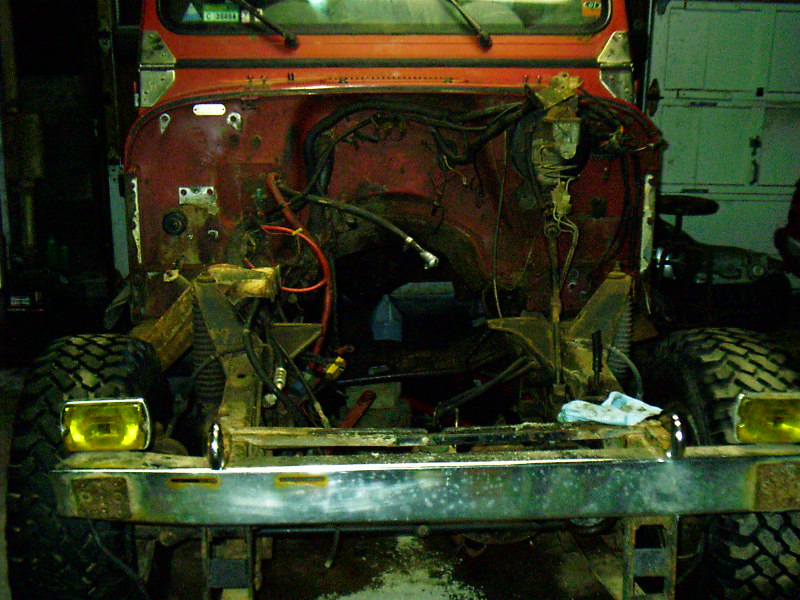
To start things off, you'll want to obviously disconnect the battery, and all electrical connections that go from the engine to the body. If the connections run from one place on the engine to another place, there's no sense disconnecting them (especially if you want to sell the engine complete). You can continue by disconnecting any vacuum lines that may run from the engine to the body (the vacuum that runs to the power brake booster, for example). There are a couple of breathers, one electrical connection, and one set of vacuum lines that run to the transmission and transfer case, but they are easier to remove as you're pulling the powertrain; so unless you feel a real need to disconnect them, you can leave them until it's time to pull everything. As you are disconnecting things, keep in mind to disconnect things such as radiator hoses (I pulled mine off the radiator and left them attached to the engine), fuel lines, clutch lines, and power steering lines. NOTE: THE CLUTCH OPERATES WITH BRAKE FLUID, WHICH IS REALLY MEAN STUFF. BE PREPARED TO CATCH THE FLUID AS IT COMES OUT! Pretty much all of them are going to drain the appropriate fluids, so be ready with a pan or funnel or something to catch the fluids, or else you'll have a rather moist work area and it won't be too fun to work in. If you want to take a break from disconnecting engine accessories, start working on body dis-assembly. You will need to remove the grill in order to be able to lift the engine and trans out. It's a good idea to get the hood off and out of the way as well. If possible, also pull the fenders off. It might be a pain, but it's worth it. The hood should pull off with just two bolts at each hinge, and disconnecting the wire to the under hood bulb. In order to pull the grill off, you will need to remove the radiator and condensor (if equipped with A/C). Headlights need to be disconnected (connector pulls straight off the back). In order to disconnect the parking light wires, remove the two screws on the front side of the lights, disconnect the light, and then you can screw the light assembly back in. As for the parking lights, they simply twist out and pull through the holes in the fenders. If you have foglights, disconnect those wires too. Once all the wires are disconnected and the radiator and condensor are out, you will need to pull the wires back out through the hole in the grill that is behind the driver side parking light (you should see where they go in). In order to get the parking light connectors through the hole, I had to remove the plastic piece of the air horn that is mounted to the grill. In order to do this, remove the four screws holding in the trim around the driver side headlight, and you can access the two screws that hold the air horn inlet in place. Once all of the wiring has been removed, you can remove the bolts that hold the grill in place; there should be five on each side (coming into the grill from inside the wheelwells), and one on the bottom in the center. Here is a picture of where the bolts on each side are located...
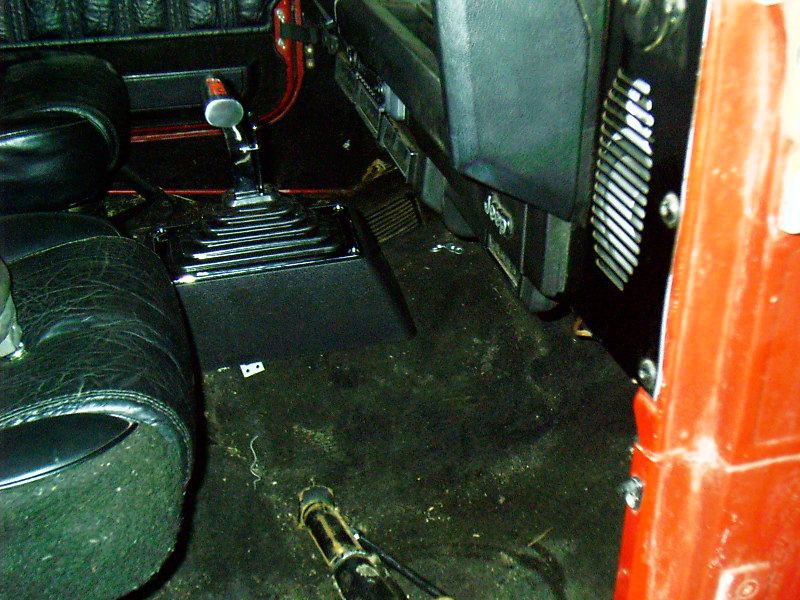
If you choose to remove the fenders, there are four bolts that run in a vertical line at the firewall and two bolts on braces near the bottom of the fender at the firewall. In order to remove the fenders, you will also have to remove things such as the coolant overflow tank, windshield washer fluid tank, computer (at least mine was located there on the driver side), and battery mounts. When you think you are ready to remove the engine, remember to disconnect a few more things. Gear shifter and transfer case shifter are the only on the inside that need to come out. Be prepared, they are a pain to remove. To get mine out, I grabbed the shifter with vice grips and hit the grips with a hammer while someone else pulled up on the shifter; seemed to work very well. You will need to pull your exhaust system off. Simply remove the two bolts where your exhaust manifold joins up with your exhaust pipe. NOTE: YOU MAY ALSO HAVE SOME LINES TO WORK FOR YOUR DUMB PULSE AIR SYSTEM; I HAD ALREADY RIPPED MINE OFF, BUT IF THEY ARE STILL THERE, THEY MAY NEED TO BE DISCONNECTED. Front and rear driveshafts need to be removed (if possible, it would be wise to mark which way the u-joints are mounted on the yokes, since the shafts are balanced and will vibrate if not installed the same way. Not a big deal since you can just put them on the other way if your first try results in vibration). There should be four small bolts holding down straps over the u-joint at each end of the shafts in order to remove them. If you haven't gotten a slip yoke eliminator for your t-case yet, the front end of your rear driveshaft will need no disassmebly, it will simply slide straight out of the tail of the t-case. While you're disconnecting the rear driveshaft, grab a few wrenches and disconnect your speedometer cable and transmission mount bolts. When everything up to this point has been disconnected, get a cherry picker hooked up to the engine and give the chains just enough lift to be pulled tight....
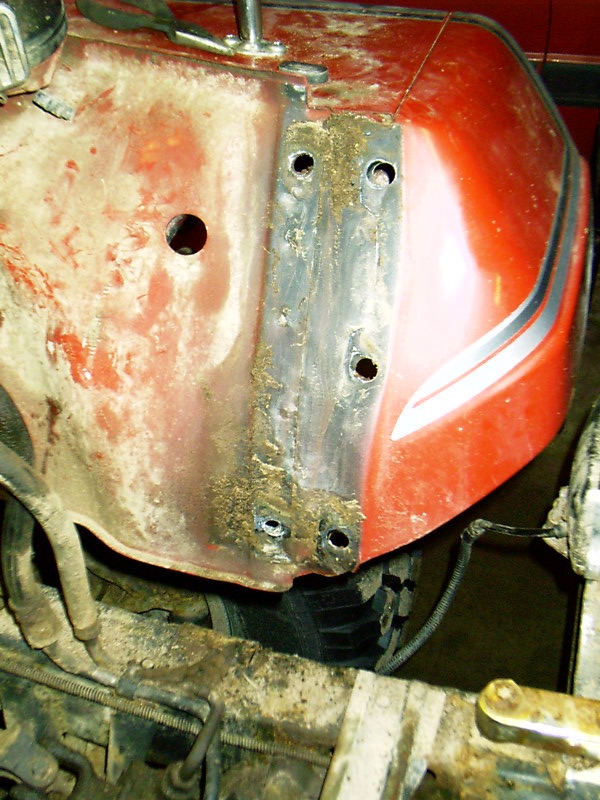
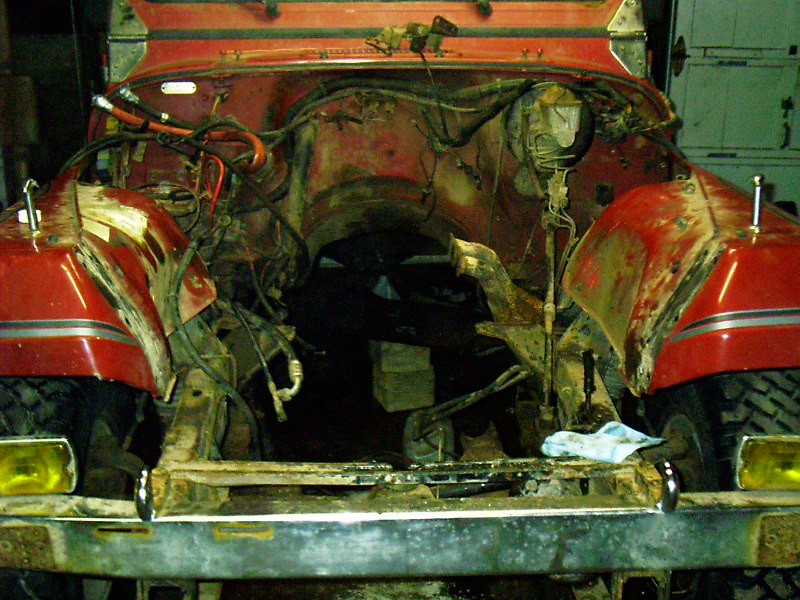
At this point, you can remove the engine mounts from the frame. Each mount should have one bolt that threads from the top on the frame side of the mount, and one nut that threads from the bottom on the engine side of the mount. At this point, it is a good idea to go through everything very thoroughly to make sure that nothing has been forgotten. Especially make sure to see that things that will be re-used are not going to be damaged (such as the cable to control your throttle linkage). If you are confident that you have everything, you can to begin to raise the engine up. It won't leave the frame right away, but don't worry; your suspension is going to be pushing up until all of the weight is off. If you can get a load leveler on the cherry picker, it is very handy; so that you can adjust the weight to be more at the back or front of the engine. As you pull the engine forward, go slowly and keep an eye out for anything that might be catching on something. Some things you may be able to snake around, but if it's easier to just disconnect it, save yourself the trouble. For example, I also pulled my starter to avoid having to snake it past the engine mount. As you pull the powertrain out, you may run into a problem of your shifters (the short pieces that are still sticking up) being too tall and hitting the body, preventing forward motion. If this is the case, simply disconnect some or all of your skid plate (three bolts down each side) and let it drop down, allowing the transmission and transfer case to hang down lower. As you pull the powertrain forward, keep checking for any connections that might have been missed. As the transmission and transfer case come into the open, you can now access any lines that need to be disconnected. In my case there were two breathers to the transmission, one electrical connection to the transmission, and one pack of four vacuum lines to the transfer case for shifting (my front axle is the vacuum actuated model). Once all of these are disconnected, just keep pulling it all out. Once you are clear of everything, find a good place to set the whole thing down. Find some soft things to set it down on so that nothing gets damaged. At this point your Jeep might look something like this.......(my fenders were still on at this point because they were being a pain to separate from the firewall, but they should be off shortly so that I can do my exhaust work without as much of a pain)
It's hard to remember everything, so if there's something that I haven't mentioned, and it's holding you up, shoot me an email at KillerKoro@aol.com and I'll see what I can do to help you keep things moving. If I don't personally know the answer, I should be able to get an answer from someone who does.
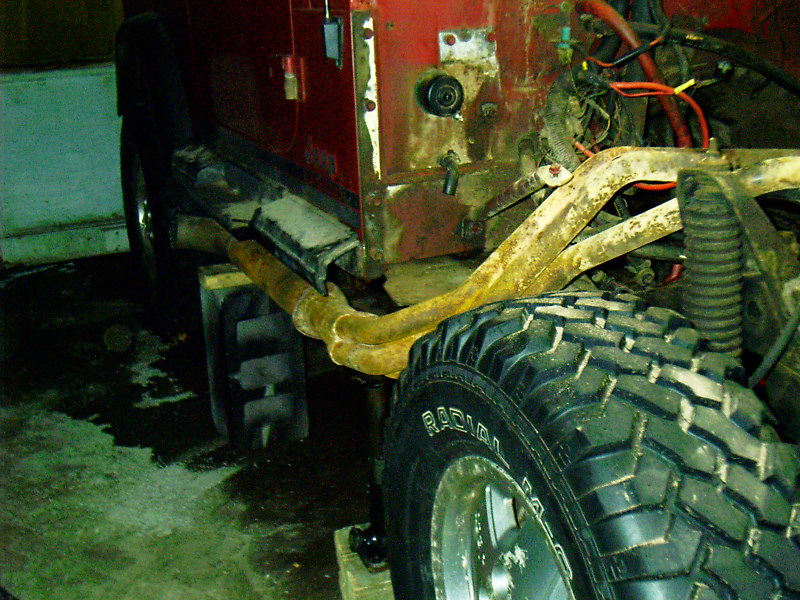
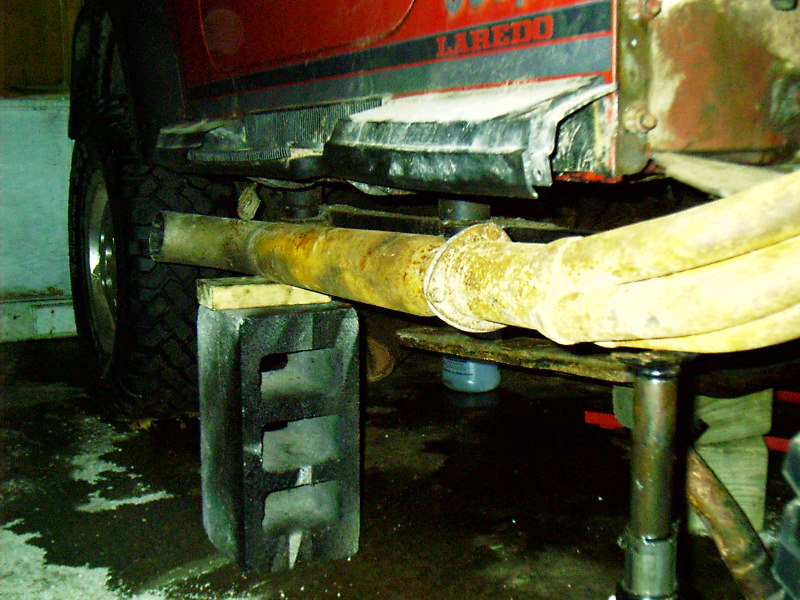
While the project is nowhere near being completed yet, I was getting a little anxious to see how my exhaust system was going to look on my Jeep. So, being excited and very impatient, I slipped one side of my exhaust-system-to-be in place. Hopefully everything will go together nice and it won't be very long before i get to hear the 350 fire up through these pipes!!!
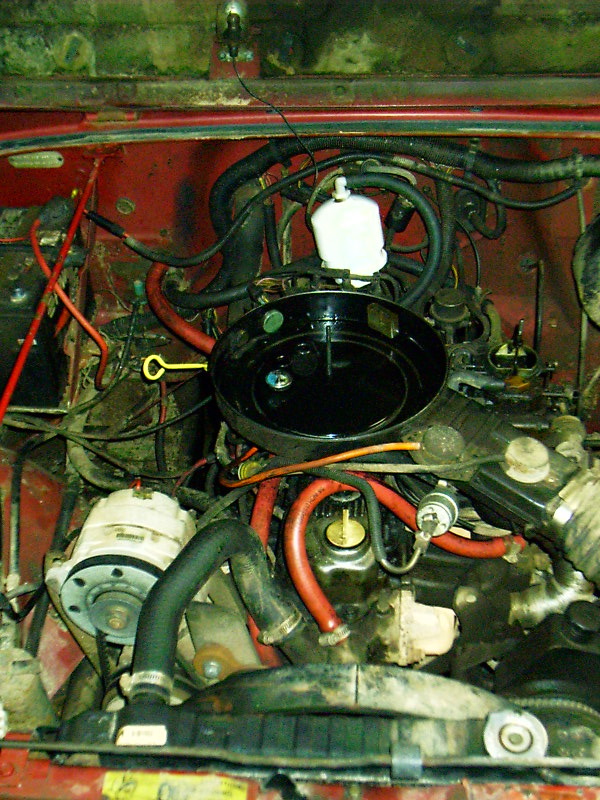
While the old powertrain was out, and I was still working on getting all of the new stuff bolted together, I kept busy with grinding off my old engine mounts and installing my new shifter (since my 350 is going to be coupled up to an automatic). If you're getting all new adapters and mounts and whatnot (mine came from Novak Adapters - www.novak-adapt.com - and they were really great about helping me get everything figured out. Advance Adapters has most of the stuff too, but their prices were considerably higher), it's a good idea to get the old engine mounts off and grind them down to the frame as nicely as possible. The passenger side one is no problem at all to get at from all angles, but be ready, the driver side mount is a pain in the behind. Brake lines, fuel lines, and the steering column do a pretty good job of completely surrounding it. The fuel lines aren't too bad to just hold back while you grind, but I would recommend undoing some of the brackets that hold the brake lines in and pulling them up and over the shock mount in order to get them out of the way.
If you are switching from a manual to an automatic transmission, you're going to need some sort of shifter for it. I went with the B&M Megashifter. It's very easy to install and also very easy to get adjusted. B&M has some very easy to follow instructions and it'll be installed in no time. While mine isn't completely installed at this point, this is roughly how it'll look when it's complete...
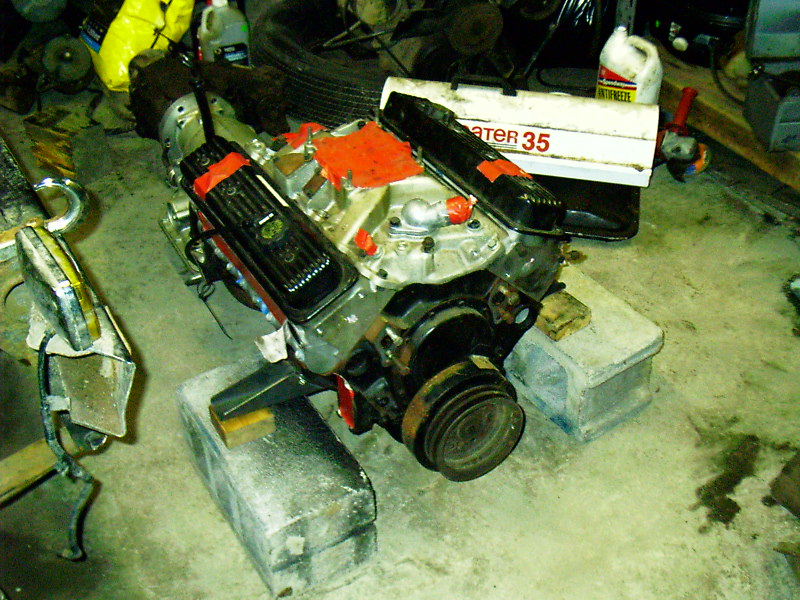
When my adapters finally showed up, it was time to start getting the new powertrain assembled and ready to go in. The first step required taking the transmission completely apart to get a new output shaft on it (if you can't manage this part on your own confidently, take it to a shop to get it done. no sense screwing something up). Then the adapter plate was bolted onto my TH350 transmission, followed by coupling my NP231 transfer case to the new tail of the transmission. For me, it took a little work to get the transfer case to slide on, but being persistent is what got it on...
At this point, the transmission and transfer case were together as a unit and ready to be bolted up to the engine...
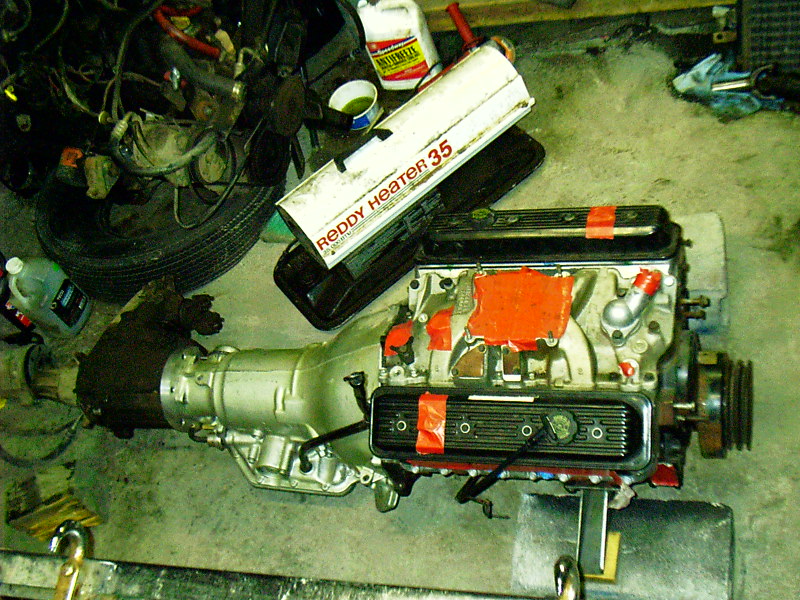
Before bolting the transmission bellhousing up to the engine, the torque converter needs to be slid onto the input shaft of the transmission. Before sliding the torque converter on, put about a quart or two of automatic transmission fluid in the converter. Then the torque converter should slide easily onto the input shaft. Once it is in place, the transmission/transfer case assembly can be coupled up to the engine. There are two dowels (one on each side of the engine) that allow this alignment to be done much easier. Simply slide the transmission onto the dowels and begin threading the bellhousing bolts. Don't thread the bolts on very much though; just enough to be able to hold the transmission in alignment with the engine (if you're installing a manual transmission, assuming the clutch is aligned already, ignore this step and feel free to go right ahead and torque the bellhousing bolts down). At this point get the torque converter to flexplate bolts started. You will need to turn the engine over (not literally, just turn the crankshaft) in order to get all the bolts started. Once they are started, go back and tighten down the bellhousing bolts in order to ensure that the engine and transmission are completely aligned. After the bellhousing bolts are torqued down, go back through and torque all of the torque converter bolts. At this point, the powertrain should be all assembled and just about ready to go in. For ease of locating where it will need to be placed in the Jeep, and also for ease of keeping it stable while waiting to go in, it's not a bad idea to bolt on the engine and transmission mounts and rest the assembly on them (the engine mounts will need blocks in order to keep the oil pan off the ground)...
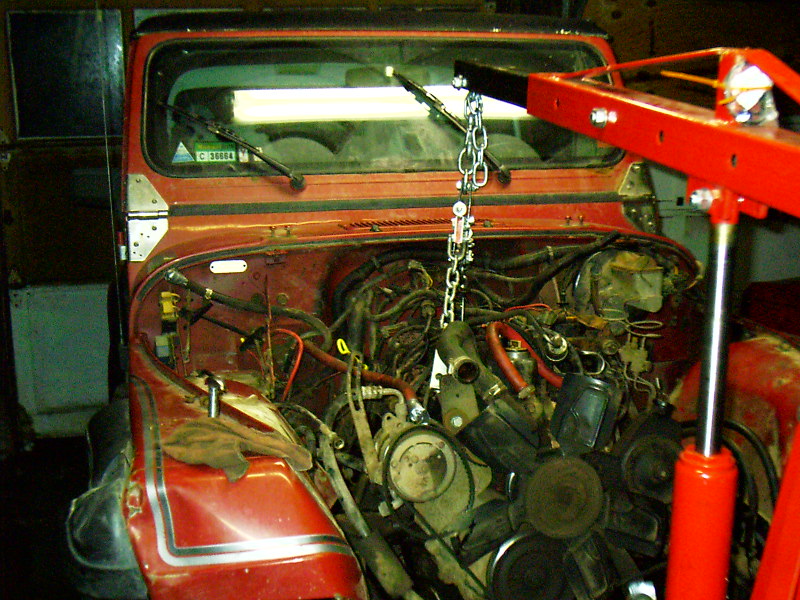
Next up is the fun of putting the engine in and pulling it back out a few times. Make sure that all of the engine mounts and transmission mounts that bolt on to the powertrain, are bolted on. Then lift the engine into the place where you want it to sit. Ideally you want to get it back and as tight up to the firewall as possible to allow for all the accessories, radiator, fan(s), etc out in front of the engine (doing this will also keep your center of gravity down for those crawling times when your front end goes up). For the most part, try to place your engine with the center of the crankshaft and the center of the tailshaft of the transmission lined up in the center of your frame. However, for some things, you may want to slightly vary this location. For example, if you have plans, like me, to replace the stock Dana 35 rear axle with a Dana 44, you might want to offset the tailshaft ever so slightly to the passenger side (due to the Dana 44 geometry). At any rate, once you have the engine in the place you want it, mark on the frame where the engine mounts will need to be attached and take the powertrain back out. You can either drill holes and mount them via bolts, or weld them to the frame. I chose welding. Whichever method you choose, completely attach the mount on only one side and then hoist the powertrain back into place. Then you can confirm where the mount needs to be on the other side. NOTE: IF YOU TRY TO COMPLETE BOTH SIDES AT ONCE AND THEN PUT THE ENGINE BACK IN, YOU MAY RUN A RISK OF THE MOUNTS NOT LINING UP VERY WELL. Once you have completed the mounts on both sides, drop the powertrain back in for the final time and you can bolt all the mounts in place. NOTE: THE TRANSMISSION MOUNT MAY REQUIRE DRILLING NEW HOLES IN THE SKID PLATE. THE HOLES ON THE MOUNT THAT I GOT LINED UP WITH THE HOLES IN MY SKID PLATE, BUT TO PLACE THE TRANSMISSION WHERE I WANTED IT, I HAD TO DRILL NEW ONES.

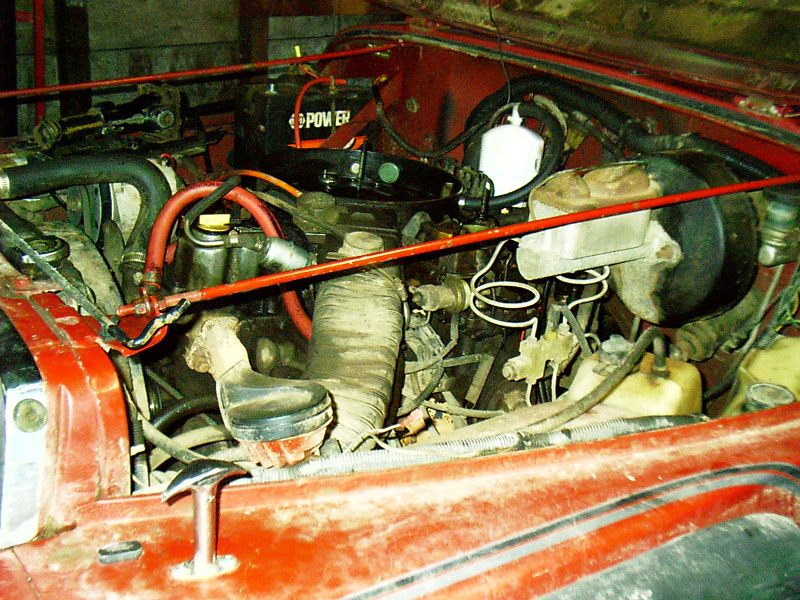
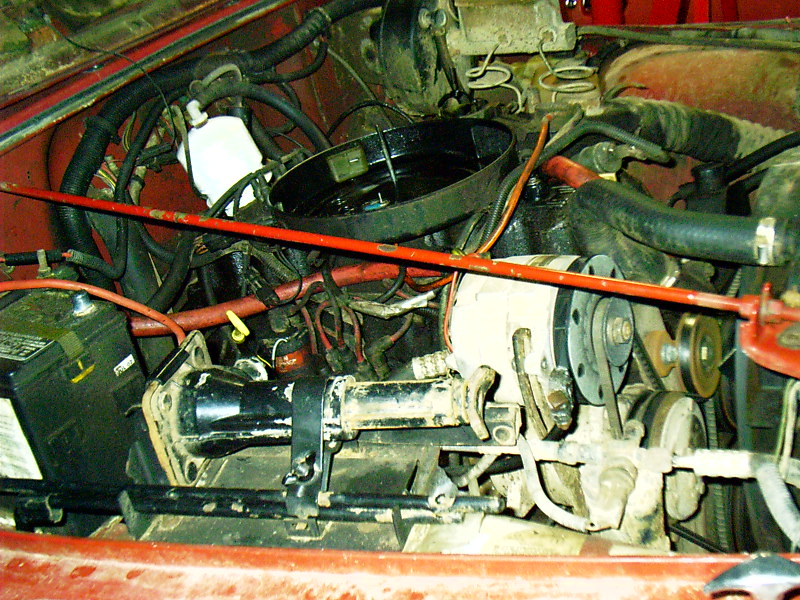
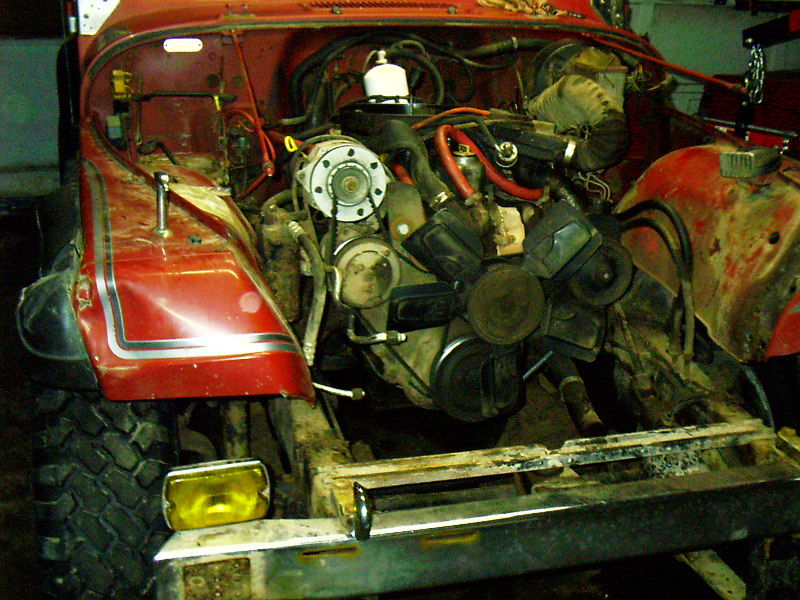
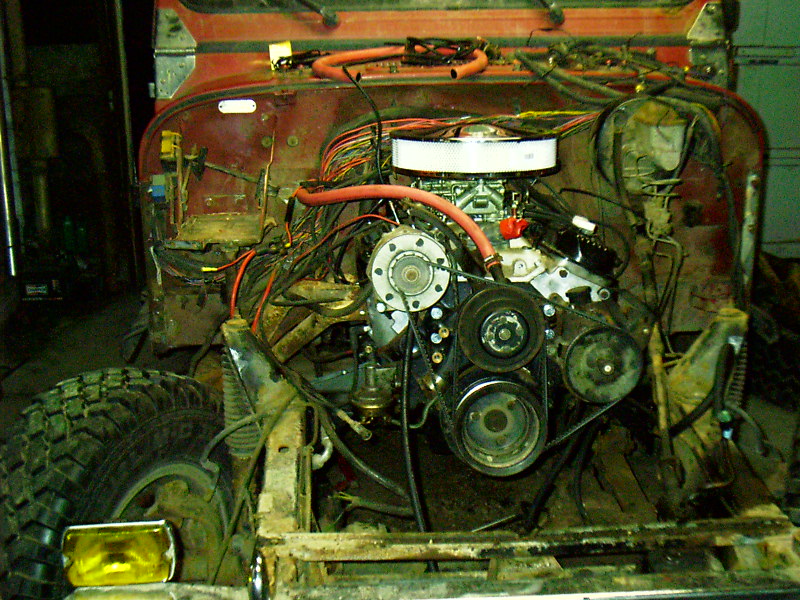
Once the engine is sitting soundly in the Jeep, it's just re-assembly. Accessories can be attached to the front of the engine, fenders and grill can be re-assembled, etc. If you run with fenderwell headers like I am, you'll want to make sure everything has the proper clearance. Mine are actually from a CJ (which has a more narrow frame than the YJ) but they still fit pretty nicely. The passenger side clears the frame no problem and only requires very minimal trimming of the fender. On the driver side however, I had to do a little work. The header required a little bit of bending in order to get it up to clear the frame. The brake lines also had to be bent a little bit to make room for the header to be installed. Other than that, just a little bit of minor fender trimming like on the passenger side. Front accessories for my new engine were all pulled from a junkyard (where I also got my starter). As for gauges, since I am keeping my same transfer case, my speedometer setup is completely un-affected, as is the fuel level gauge and the battery gauge. The tach is still functional, however, since it is switching from a 6 cylinder to an 8 cylinder engine, it is not accurate and will require switching. For my oil pressure gauge, I simply unscrewed the sensor from my 4.2L block and went to the parts store. There I got an adaptor to switch to the necessary thread to screw it into the 350 block. With my water temp sensor being all that is left, the thread of my 4.2L's sensor is the same as the thread on the intake of the 350, so that required no adapting whatsoever. Also, due to the switch from a manual to an automatic transmission, I added a transmission temperature gauge. They are very simple to install and always nice to know how the temperature is looking. Another upgrade I made in this swap was the radiator. The stock YJ radiator really isn't setup to be cooling a 350, and it's also nice to have some transmission cooling lines in the radiator. And if you don't bite the bullet and get something that can cool everything now, you're going to have to later on and probably regret it then. So do it right the first time and do it when you're doing the swap. I decided to go with a very large aluminum radiator with transmission cooling lines internally, along with an external transmission cooler mounted on the front. All of the fluid is cooled by dual electric fans: one controlled automatically with an adjustable switch, and the other controlled manually for those times when the tranny starts to get a little warm. The only other thing I needed to adapt was my driveshafts. My rear needed to be about 6" longer, and my front needed to be about 6" shorter. Due to my low budget, I opted to have mine modified rather than buying new ones. The people at Tom Wood's Custom Driveshafts were incredibly great to work with and their prices are awesome. Beyond that, it was all a matter of staying persistent and just keep putting everything that you took off, back on. Once it's all back together, fire it up, fine tune things like the timing, take it for a test drive, and enjoy the power!

For the parts that I used to do my engine swap that I did not obtain from local auto parts stores (and if I can find parts at auto parts stores in BFE Houghton, MI, I think anyone can find plenty of parts wherever they are) I ordered from the following companies online:
1) Summit Racing Equipment
2) Novak Adapters
*I did find that there are a couple of items that Novak did not have that can be found at Advance Adapters
3) 4 Wheel Drive Hardware
4) Jeg's
Back to top of page
Click here to return to Koro's homepage